Juritronics Build smarter. Present faster.

Project Videos

Juritronics player view
Build video
The whole build in about five minutes: the cube, the base box, the sensor, wiring and a few rounds against the robot.

Documentation, Diagrams and Code

Sign in to view

What is the RPS Bot?

Photo or diagram Sign in to see the images for this step. Sign in

The RPS Bot plays rock, paper, scissors against you. A cardboard cube sits on top of a servo motor. Three of its sides carry a printed hand: a fist (rock), an open hand (paper) and two fingers (scissors). Put your hand in front of the ultrasonic sensor and the robot makes its move by turning the cube to one of those sides.

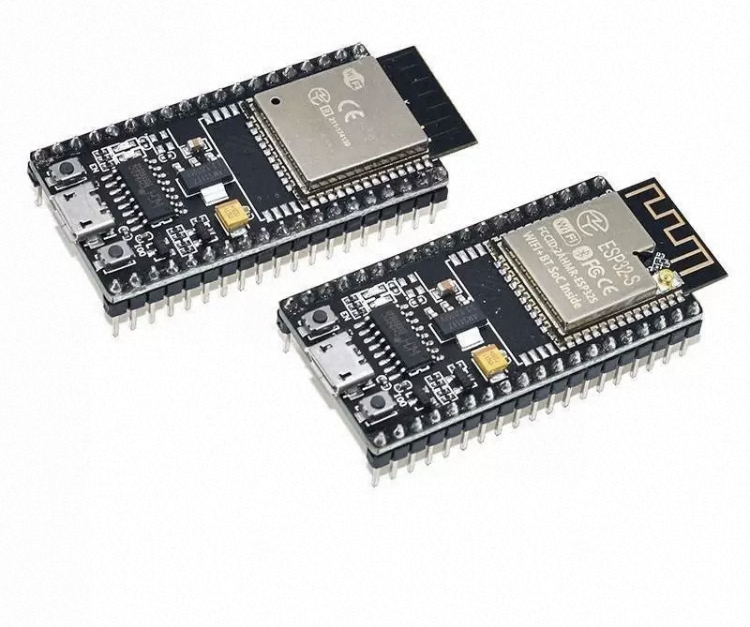
Everything runs on one ESP32 DevKit. There is no app to install: the ESP32 creates its own open Wi-Fi network called RPS-Bot and the dashboard opens on your phone as soon as you connect.

What you will learn

  • Reading distance with an HC-SR04 ultrasonic sensor on a 3.3 V ESP32 (with a voltage divider).
  • Driving a 360° continuous rotation servo to exact positions using timed moves.
  • Writing a non-blocking state machine and running it in its own FreeRTOS task.
  • Serving a web dashboard and a captive portal from the ESP32, and saving settings in flash.
  • Building a sturdy robot body from cardboard, and testing a circuit in a simulator before wiring the real thing.

The rules, as the robot plays them

  • Rock beats scissors (it blunts them).
  • Scissors beat paper (scissors cut paper).
  • Paper beats rock (paper covers the rock).

Count “rock, paper, scissors”, show your hand in front of the sensor and see what the robot picked. You keep the score.
Watch the Build Video

Video for this step Sign in to watch this video. Sign in

The video shows the whole build in about five minutes: making the 5 cm cube and fixing it to the servo, building the 12 × 6 cm base box, mounting the servo and the ultrasonic sensor, gluing on the rock, paper and scissors hands, wiring the ESP32, testing the circuit in the simulator and finally a few rounds against the robot. Every step from the video is written out below with the sizes and tips, so you can follow along at your own pace.

How the Rock Paper Scissors Robot Works

Photo or diagram Sign in to see the images for this step. Sign in
  1. Wait for a hand. The HC-SR04 pings every 60 ms. A hand counts once two readings in a row are closer than 15 cm, so one noisy echo cannot start a round.
  2. Hold. The hand has to stay for 300 ms. This stops the robot from reacting to something just passing by.
  3. Pick a side. The ESP32 uses its hardware random number generator (esp_random()) to choose Left, Front or Right. It never shows the same side three times in a row.
  4. Turn. The servo spins the cube to the chosen side. If the pick is already facing you, the cube does a small wiggle so you can see it answered.
  5. Reveal and return. The pick is shown for 3 seconds, then the cube goes back to Front.
  6. Wait for the hand to leave. One hand means one round. Move your hand away and play again.

The on-board LED (GPIO 2) lights up while a hand is detected, which makes testing the sensor easy.

Why timed moves?

A 360° servo does not know its angle. It only knows speed: a 1500 µs pulse stops it and pulses above or below make it turn one way or the other. So the code turns the servo for a calibrated number of milliseconds for every move (Front→Right, Right→Front and so on) and saves those times in flash. The cube never turns through the back, so the cable never winds up.

Components and Parts List

Photo or diagram Sign in to see the images for this step. Sign in
PartQtyNotes
ESP32 DevKit V1 (38-pin)1Any ESP32 dev board works if you keep the same GPIOs.
HC-SR04 ultrasonic sensor1Detects your hand. Runs on 5 V.
360° continuous rotation servo (SG90 / FS90R type)1Must be the continuous type, not a 180° servo. The video uses an SG90; an MG90S (metal gears) is a bit stronger if your cube is heavy.
1 kΩ resistor1Top of the ECHO voltage divider.
2 kΩ resistor1Bottom of the divider (or two 1 kΩ in series).
5 V power supply1For the servo. A USB power bank or phone charger is fine.
Jumper wires12Dupont male/female.
Cardboard box and a 5 cm cardboard cube1The box hides the electronics; print rock, paper and scissors for the cube.
Glue (hot glue gun or strong craft glue)1Holds the cube, the box, the servo and the sensor stand together.
Rock, paper and scissors pictures3Printed, or drawn by hand if you like drawing. About 4 cm wide so they fit the cube faces.

The LED on GPIO 2 and the BOOT button on GPIO 0 are already on the ESP32 board.

No parts yet? You can run the full circuit and code in the simulator in the next section first, then buy the parts once you have seen it work.

Circuit Diagram and Wiring

Below is the full ESP32 HC-SR04 servo circuit, running the real code. To play a round in the simulator:

  1. Press Run + phone dashboard. The robot's phone dashboard opens next to the circuit.
  2. Press This is Front on the dashboard. Like the real robot, it does not move until it knows where Front is.
  3. In Simulation Inputs, press and hold Hold to detect (your hand in front of the sensor). The servo turns to rock, paper or scissors.

Use Edit circuit to change the wiring or open it in a full window.

FromToWhy
HC-SR04 VCCESP32 VIN (5 V)The sensor needs 5 V.
HC-SR04 GNDESP32 GND
HC-SR04 TRIGGPIO 53.3 V is enough to trigger it.
HC-SR04 ECHO1 kΩ → GPIO 18, with 2 kΩ from GPIO 18 to GNDBrings the 5 V echo down to about 3.3 V.
Servo signal (orange)GPIO 1350 Hz PWM from the ESP32 LEDC.
Servo + (red)5 V supply +Keep servo current off the ESP32 regulator.
Servo − (brown)5 V supply − and ESP32 GNDThe grounds must be shared.

Important: never connect the HC-SR04 ECHO pin straight to the ESP32 while the sensor runs on 5 V. The ESP32 pins are 3.3 V only and a 5 V echo can damage them over time.

Wire colours used in the video

Using the same colours every time makes the wiring much easier to check:

HC-SR04 pinWire colour
VCCRed
TRIGWhite
ECHOBrown
GNDBlack

Simpler option: the sensor on 3.3 V (no resistors)

In the build video the sensor is powered from the ESP32 3.3 V pin instead of 5 V. Then the ECHO pin only ever outputs 3.3 V, so it can go straight to GPIO 18 and you can skip the voltage divider.

  • Many HC-SR04 modules work on 3.3 V, but some do not, and the range is usually shorter. That is fine here, because the robot only needs to see a hand closer than 15 cm.
  • If the distance reading stays empty or jumps around, move VCC to 5 V and add the divider as in the table above.
  • The HC-SR04P and RCWL-1601 versions are made to run on 3.3 V to 5 V, so they are the safest choice for this option.

Powering the servo from the ESP32

In the video the servo + wire goes to the ESP32 5 V (VIN) pin, with no extra supply. With one small SG90 and a good USB cable and charger this works well. If the ESP32 resets or the Wi-Fi drops when the servo starts, give the servo its own 5 V supply and connect the grounds together, as in the table above.

Interactive circuit Sign in to open and simulate the circuit. Sign in

Building the Cardboard Cube and Base

Photo or diagram Sign in to see the images for this step. Sign in

The whole body is cardboard and glue. It takes less than an hour, and it does not need to be perfect.

1. The 5 cm cube

  1. Make a 5 cm cube from thin cardboard: cut a cross-shaped net of six 5 × 5 cm squares (as shown in the video), fold it and glue the edges.
  2. Glue a servo horn to the centre of the bottom of the cube and press it on the servo shaft.

2. The base box

  1. Make a bigger box for the base: 12 cm long and 6 cm wide. Copy the net from the video and glue it together.
  2. Glue the servo on top of the box near one end. Put glue on the servo body and under its mounting tabs. Be careful that the cube's Front side faces forward, towards the player.
  3. For a neater look, you can also cut a hole in the lid, push the servo through and fix it with hot glue so it cannot twist.

3. The ultrasonic sensor stand

  1. Connect the four sensor wires first (red VCC, white TRIG, brown ECHO, black GND). It is much harder once the sensor is glued down.
  2. Make a small cardboard stand at the other end of the box and glue the HC-SR04 to it, facing the player.
  3. The height does not need to be exact. Choose a height where your hand comes naturally in front of the sensor.

4. The rock, paper and scissors hands

  1. Print the three hands, or draw them yourself: a fist for rock, an open hand for paper and two fingers for scissors.
  2. Glue them on the Left, Front and Right sides of the cube. Leave the back empty, because the cube never turns through the back.

5. The electronics

  1. Put the ESP32 (and the two resistors, if you use them) and the wiring inside the box and bring the USB cable out the back.
  2. Wire everything as in the circuit diagram above. Try the circuit in the simulator first if you have not yet.

The full making-of is in the build video at the top of this page.

ESP32 Code: Main Sketch (main.cpp)

The main sketch holds the game state machine, the BOOT button, the web API and the captive portal. The motor, sensor and game logic run in their own FreeRTOS task on core 1, so a slow phone connection can never delay a servo stop. Put each of the following files in its own tab in the Arduino IDE (or in src/ for PlatformIO).

Code for this step Sign in to view and copy the code. Sign in

config.h and secrets.h: Pins and Wi-Fi

config.h holds the pin map and the names of the faces and symbols. secrets.h holds the Wi-Fi names. Leave STA_SSID empty to only use the robot's own RPS-Bot network, or fill it in to also join your home Wi-Fi.

Code for this step Sign in to view and copy the code. Sign in

motor.h: Positioning a 360 Degree Servo

Each move runs the servo for its calibrated time, then holds the stop pulse while the cube settles and finally switches the pulses off so the servo does not buzz. An optional short reverse pulse (brake) stops a heavy cube faster.

Code for this step Sign in to view and copy the code. Sign in

settings.h: Calibration Saved in Flash

All settings live in the ESP32 flash using Preferences, so your calibration survives a power cut. The defaults turn a quarter turn in 375 ms.

Code for this step Sign in to view and copy the code. Sign in

sensor.h: Reliable Hand Detection with the HC-SR04

The sensor is read every 60 ms. Two close readings mark a hand as present and three far readings mark it as gone. While the servo is turning the sensor is not pinged, because pulseIn() blocks for a few milliseconds and would make the stop late.

Code for this step Sign in to view and copy the code. Sign in

web_page.h: Phone Dashboard

The dashboard shows the current pick, the distance reading and the round counter. It has buttons to play, set the Front side, jog the cube and change the main settings.

Code for this step Sign in to view and copy the code. Sign in

Uploading the Code and Calibrating

Photo or diagram Sign in to see the images for this step. Sign in

Tip: run the code in the simulator first (Circuit Diagram section). When the simulated servo turns to random sides each time you hold Hold to detect, you know the code and wiring are right before you touch the real board.

  1. Install the ESP32 board package version 3.x in the Arduino IDE (the code uses ledcAttach() from core 3).
  2. Select ESP32 Dev Module, create the tabs above, and upload.
  3. Turn the cube by hand so the Front side faces you.
  4. Connect your phone to the open Wi-Fi RPS-Bot. The dashboard opens by itself (or visit http://192.168.4.1 or http://rpsbot.local).
  5. Press This is Front, or hold the BOOT button for 2 seconds. The robot does not move until it knows where Front is.
  6. Press Show Right and Show Front. If the cube stops short or goes too far, adjust Front to Right and Front to Left in milliseconds and save.
  7. If the servo creeps when it should stand still, change Servo stop a few microseconds up or down.

Troubleshooting

  • The cube does not move: press This is Front first. Check that the servo ground is connected to the ESP32 ground.
  • It reacts to nothing: lower Hand closer than (cm), or point the sensor away from walls and cables.
  • The distance always says nothing in range: check the ECHO divider and that the sensor has 5 V on VCC.
  • The cube drifts after many rounds: fine tune the move times, or add a few milliseconds of brake.
  • The ESP32 resets when the servo starts: power the servo from a separate 5 V supply instead of the ESP32 pin.
  • The sensor works on 5 V but not on 3.3 V: your module needs 5 V. Move VCC to VIN and add the 1 kΩ / 2 kΩ divider on ECHO, or use an HC-SR04P.
  • The wrong picture faces you: check that the servo was glued facing forward, turn the cube by hand to Front and press This is Front again.
  • The cube wobbles or falls off: glue the servo horn to the centre of the cube, and make sure the servo itself is glued firmly to the box so it cannot twist.
  • The servo turns but the cube slips: press the horn fully onto the shaft. A heavy cube may need the stronger MG90S servo.

Frequently Asked Questions

Can I use an Arduino Uno instead of an ESP32?

The game logic works on an Uno, but the Wi-Fi dashboard needs the ESP32. Without it you would set the move times in the code. The Uno runs on 5 V, so the HC-SR04 connects straight to it with no voltage divider.

Do I need to buy the parts to try it?

No. Open the circuit above and press Run + phone dashboard. The real code runs in the simulator and the servo turns to random sides when you hold Hold to detect. You can change the wiring and the code without buying or connecting anything.

SG90 or MG90S servo?

Both work. The SG90 has plastic gears and is fine for a light cardboard cube. The MG90S has metal gears and a little more torque, which helps if your cube is heavier or the servo struggles to stop on time. Whichever you choose, get the 360° continuous rotation version.

Can I run the HC-SR04 on the ESP32 3.3 V pin?

Often yes, and that is how the build video does it, with ECHO straight to the ESP32 and no resistors. Some modules need the full 5 V though. If yours does not give stable readings on 3.3 V, use 5 V with the voltage divider.

Can I use a normal 180 degree servo?

Yes, and it is simpler: write the angles 0°, 90° and 180° for Left, Front and Right instead of timed moves. This build uses a 360° servo because it was the part on hand and it teaches timed positioning.

Is the robot's choice really random?

Yes. esp_random() uses the ESP32 hardware random number generator, which is truly random while Wi-Fi is running.

Can the robot cheat and see my hand?

Not in this version. The HC-SR04 only measures distance, so the robot decides before it can know your move. Adding a camera to read your hand is a good next project.

Mini Store

Open full store